I love sketching and painting outdoors. It’s like meditation through art, having nothing to do but focus on a subject while out in the fresh air. Until I get a sun burn. And maybe start wondering if that hissing sound is coming from a rattlesnake, or if it’s just a piece of trash rustling in the wind. These need-to-know tips for sketching and painting outside come from my own experiences, hopefully they’ll save you some of the pain I’ve gone through to learn them!
Why Make Art Outside?
Well, if you work from home like I do, getting out becomes necessary for your mental health as an artist. I’m sure office workers can relate, too, a change in environment is always refreshing. Or maybe you’re in school all day, this can be a way to make time for yourself while still getting your art homework done.
When possible, I always recommend working from life over photo reference. The camera lies. Or rather, the photographer lies. Lenses will cause distortion, pulling or pushing a background closer or further from the viewer. Focus is chosen, lighting and color can be manipulated. You end up handing over some of your artistic choices to someone else if you only use photos other people have taken.
By working with your own eyes, you have to mentally edit and make decisions that the camera might have made for you, especially in regards to composition. You have to work with what is in front of you, and that limitation can also be freeing! I know I can find the blank page intimidating.
There’s no pressure to make it look good. You don’t have to show what you made to anyone if you don’t like how it turns out. Just enjoy yourself, get outside, and work on your skills.
Finding the Right Spot
Being comfortable will make a massive difference in your concentration. You don’t need to show how hardcore you are by sitting all twisted up like a pretzel on a sharp rock, blasted by the sun. If you’re in a cold-weather environment, bring along some heat packs for your hands. I’ve got the opposite problem, I’m fishbelly white and I live on the surface of the sun. I need extra water, sunscreen and a good dorky hat at minimum.
Follow the Light
If the sun is directly on your subjects and there’s a lot of light and shadow, that’s a great way to practice rendering and learning how to make an object appear more three-dimensional. If the day is overcast or there are no strong sources of light on your subject, the drawing will be more about graphic shapes. Dappled light will give a more impressionistic feel to your sketches. This concept about rendering vs. graphic shapes might be new to some people, so I’ll go over it more in my next post when I talk about what artistic decisions you can make once you’re sitting down with your sketchbook and pencils.
But Sit in the Shade
Keep in mind that bright light can reflect off your drawing surface, leaving you squinting even with your shades on. It’s less of a concern elsewhere, but out west in the USA? Yeah, my paper is blinding if I sit in the sun. Toned paper or a wash of color on your painting surface can cut down on glare. Or some really good shades if you insist on sunbathing.
You can invest in an umbrella with a stand or an anchor spike if you’re going to be out in the open, but I wouldn’t recommend it unless you were setting up for a multiple hour piece. Just make sure you’re not stabbing it down onto desert cryptobiotic crust, arctic tundra or other similar ecologically fragile surfaces.
Which brings me to my next point…
Leave No Trace
This is a big topic that I’m only going to brush on here. I would highly recommend you check out the Leave No Trace organization’s website for a more thorough breakdown of why it’s so important for the preservation and enjoyment of the outdoors. The basic seven rules are:
plan and prepare ahead – travel & camp on durable surfaces – dispose of waste properly – leave what you find – minimize campfire impacts – respect wildlife – be considerate of other visitors
Don’t let your ego get in the way of other people enjoying the space after you. Traveling on durable surfaces and disposing of waste properly are probably the two biggest things to keep in mind for artists out in the field.
Visit Leave No Trace Center for Outdoor Ethics for more information.
And there are extra concerns for artists because we do have some hazardous materials. Earth tones in the sienna, ochre and umber families usually aren’t much of concern as they’re often made solely with iron oxides. But cadmium paints and oil solvents are definitely not materials you want to dump out on the ground. Cadmium colors are gorgeous, but they are made from a heavy metal that you don’t want to mess with!
Pack out what you brought in, including any rags or paper towels and water. If you’re drawing, bring a canister to chuck your pencil shavings into.
Working Outside: The Set Up
Choosing Your Materials
Make a Pack List!
I’ve done this whole drawing outdoors thing dozens if not hundreds of times. I still leave supplies behind. Usually, it’s an eraser or a sharpener and I’m left cursing my past self.
Keep it Lightweight!
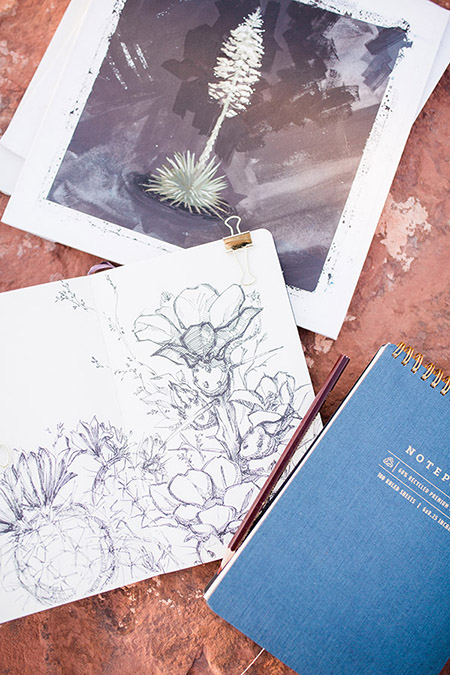
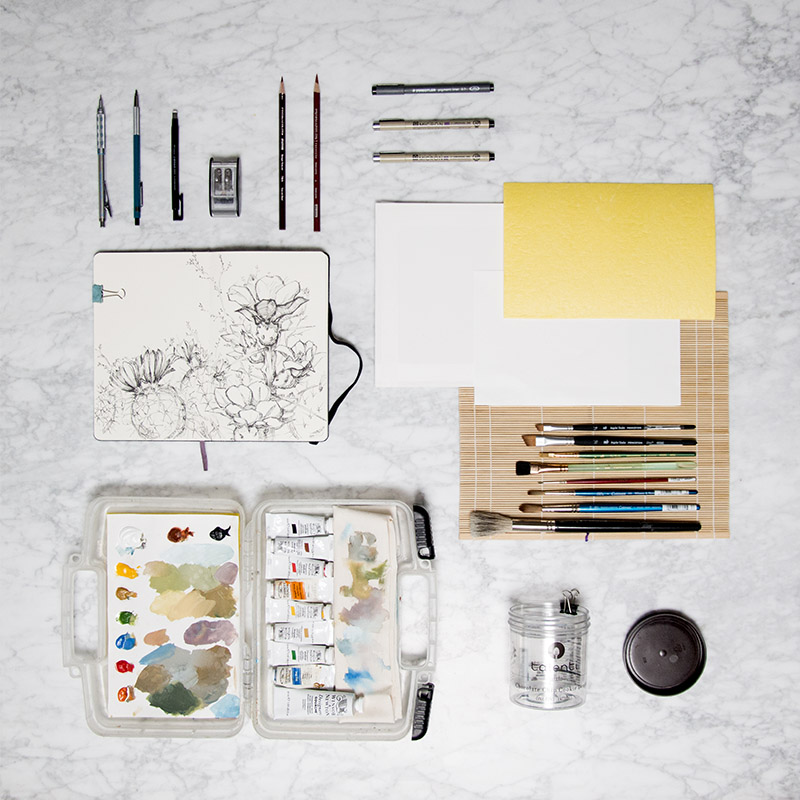
You don’t need to bring a full palette of colors with you. This is my main travel kit. It fits in a backpack, weighs under five pounds, and provides just enough palette space for me to comfortably work. I also have a lightweight camp chair and folding table I got from REI. If I’m drawing the kit’s even smaller, just a handful of pencils, a sharpener and a pad of paper.
Keep it Durable!
Yes, I’ve dropped everything in here multiple times. Sometimes I’ve sent my water jars skittering down a hill and I have to chase them down. So far, nothing has broken on me. Plus, some parks and beaches don’t allow glass containers. I tend to prefer reusing plastic ones that I would have had to toss or recycle anyway.
This is my current outdoor art kit:
Drawing Kit
Three different pen sizes, two colored pencils- one soft and one hard core- with sharpener, a small eraser, and a couple mechanical drafting pencils. And a sketchbook.
Painting Kit
–Limited palette. You don’t need twenty four colors if eight is plenty. Choose highly saturated paints that don’t lean warm or cool to get the most out of your colors. In my gouache kit, I’ve got permanent white, sky blue, sap green, yellow ochre, cadmium yellow, marigold orange, cadmium red, burnt sienna, and black. I know, some artists swear off tube black. I used to only mix my own blacks, but that’s definitely a subject for another day.
–Rags. One of the advantages of gouache is it washes out of cloth easily. Grab some scraps for wiping your brush on.
-Palette paper and sponge. I prefer using Sta-Wet palette paper and sponges over a spray bottle. I find a spray adds too much water on top of my palette. Since I’m working on a small area, this helps prevent colors from running together.
-Sealable jar. Seriously, my favorite is these Talenti gelato jars. They close up totally water tight and I get to eat the gelato before I can use them.
-Illustration or watercolor board. Just cut it and go, no need to stretch any paper or worry about buckling.
-Brushes. I’ll bring about three different shapes with two or three sizes each. Keep them in a makisu (sushi rolling mat) for protective transportation.
-Travel case. I use one of these Art Bins. Palette sponge and paper goes on one side, rags and paint tubes on the other, and it closes up and packs away small when I’m done. I got this art bin from a friend in school so it has good memories associated with it.
Know the Humidity
This one’s for the painters. It’s going to be rare that you’ll have the perfect environment for painting. Too dry and you’ll be able to lay down one layer over another quickly, but your paints will shrivel up on your palette. Too wet and you won’t be fighting evaporation, but your layers will take longer to set.
Humid air: Bring a handheld fan if you’re desperate to work fast.
Dry air: Whether I’m painting indoors or outside, I use Masterson’s Sta-Wet palette paper with one of their thin sponges underneath and it really helps extend my working time.
Anything Else?
To keep this post from stretching on forever, I’ve split it into two parts. Next time, I’ll cover some of the logistics of working outdoors, what happens once you’re all set up and ready to go. Also, how to deal with the oft-maligned public, snoops, and rubberneckers. Trust me, they’re not as bad as people make them out to be!
Recent Comments