I go to live model sessions at least once a month to practice. I find that painting traditionally and mixing colors by hand improves my skills much faster than working purely digitally. Plus, working from life presents a different challenge than working from photo reference. I’ve only got about three hours at each of these painting sessions. I need to decide quickly what I’m going to include in the image, what colors to use, and if there’s anything about the model I want to emphasize or exaggerate. Sometimes I try to stick as close to the model as possible, other times I might use them more as inspiration.
Starting Out
I normally bring a piece of illustration board to work on, but for this session, I realized I left my board at home (whoops!). Of course, the only time I have ever done this is also the only time I intended on recording every step of the way. I did grab some watercolor paper from Michael’s on my way there. It was better than driving back home or to a full art supply store and losing precious minutes of live work time. Even if it did mean I had to listen to way-too-early Christmas music while I waited in line at check out.
I was a little concerned that using unstretched paper on a non-rigid backing would cause all sorts of buckling. Luckily, I tend to use fairly dry gouache and I avoided heavily wet layers in this session, so the surface warping wasn’t a problem. I didn’t even need to adjust my painting style all that much, I just stayed mindful of how wet my brush was when working in large areas like the background.
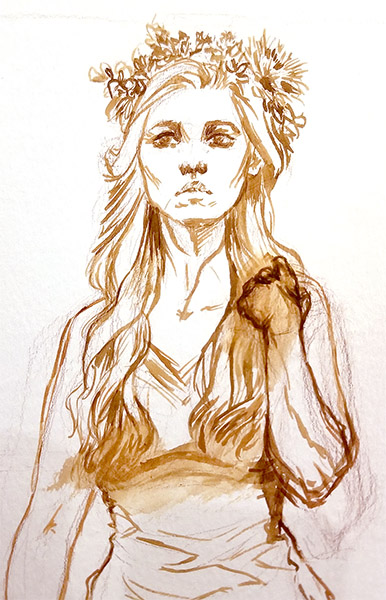
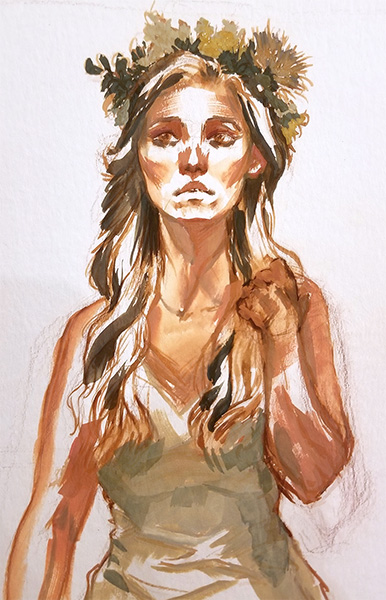
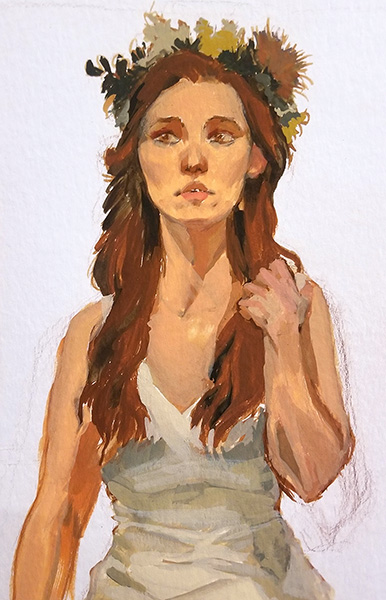
We have to be kind to the models, it isn’t easy to hold a pose and expression for hours at a time. (Tip your models, they’ll appreciate it.) Normally, there are five minute breaks for them to stand and stretch for every twenty minutes of posing. In the first twenty minute session, I lay down a sketch using colored pencil. In the next twenty minutes, I go over the sketch and outline it in gouache, then start mixing shadow tones.
I like doing this because I’m drawing the model twice. I’m familiarizing myself with their appearance before I really dig in. The colored pencil sketch lets me get the general placement and construction down. The gouache outline lets me emphasize the details and focus on the important parts of the drawing. I’ll start painting by laying in shadow shapes since I find it easier to paint from dark to light. The entire time I’m working, I’ll switch between using warm and cool tones depending on the temperature of the shadows.
Side Note: The Values of Shadows
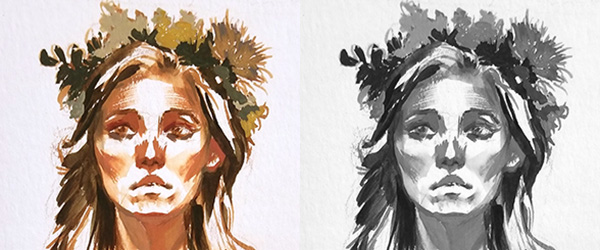
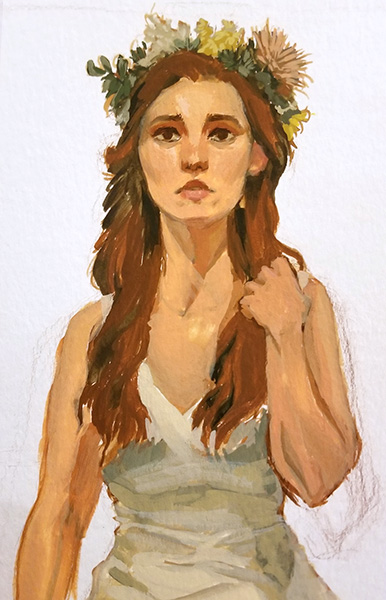
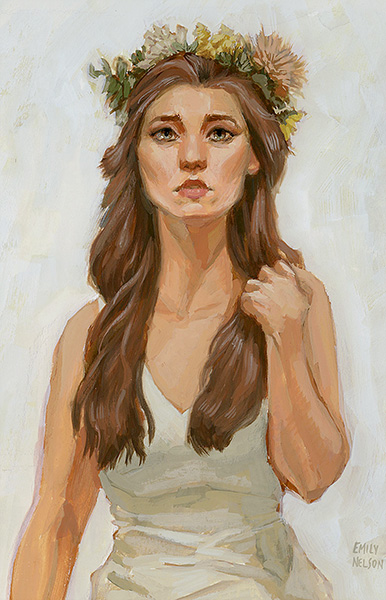
Check the shadow shapes on her flower crown. I know this is something that can trip up a lot of beginner artists. The shapes on the crown are all different values. Note how the white flowers’ shadows are much lighter than that of the dark green leaves and the pink and yellow flowers. If the color of the objects are different, then their shadows are likely composed of different values. If you’re uncertain and feel like your artistic eye needs a little help, take a picture of your subject on your phone and desaturate it.
Next, I’ll lay in a fairly thin layer of local color and allow for a little blending. I try to keep the color pretty highly saturated and a touch warm at this point. Since I’ll be adding more white paint to lighten up the top layers, I know they’ll end up cooling off and desaturating. Having a more saturated base keeps those skin tones from going sickly and gray- unless I’m trying to make someone look like a zombie!
The Second Half
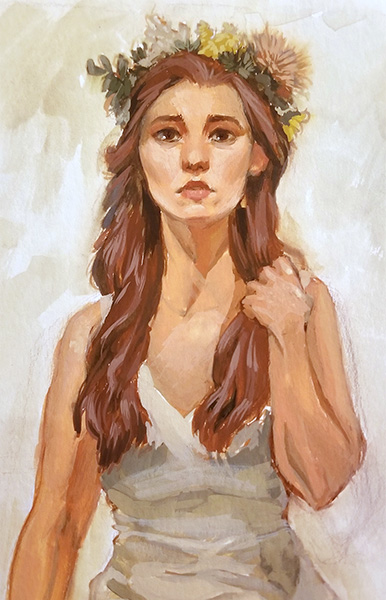
At this point, I’m usually about hallway through a painting session. If I have any major issues, I’ll correct them here. If things look okay, I’ll proceed on to laying in the light, building it up layer by layer. Gouache reactivates when wet, so if I want a softer shape and transition, I’ll keep my paint looser. Thicker paint will sit on top of the layers underneath rather than mixing with them.
Gouache also dries to a different color. Usually light colors darken down, so if I’m in doubt I’ll lay down a stroke to test how it will dry. If it doesn’t look right, it’s easier to paint over one small spot rather than a whole patch of wrong color.
This reactivation of paint can be difficult to work with at first. Oil painters and watercolorists might have an easier time transitioning to gouache, while acrylic painters might find it super irritating. If you’re just starting out, be kind to yourself and don’t get too frustrated by the medium, exploration is part of learning. It’s also how you develop your own unique style and approach, so it’s totally worth the time.
As I go, I try to work evenly across the surface, so if I stop at any point the piece will still look finished. If I build up and detail one area, I’ll do the same to the others. I’ll continue to work the piece until time is up or I’m ready to stop. Of course, some areas will receive more attention and detail, but I don’t want to make it look like I ignored or rushed anything.
Finishing Up
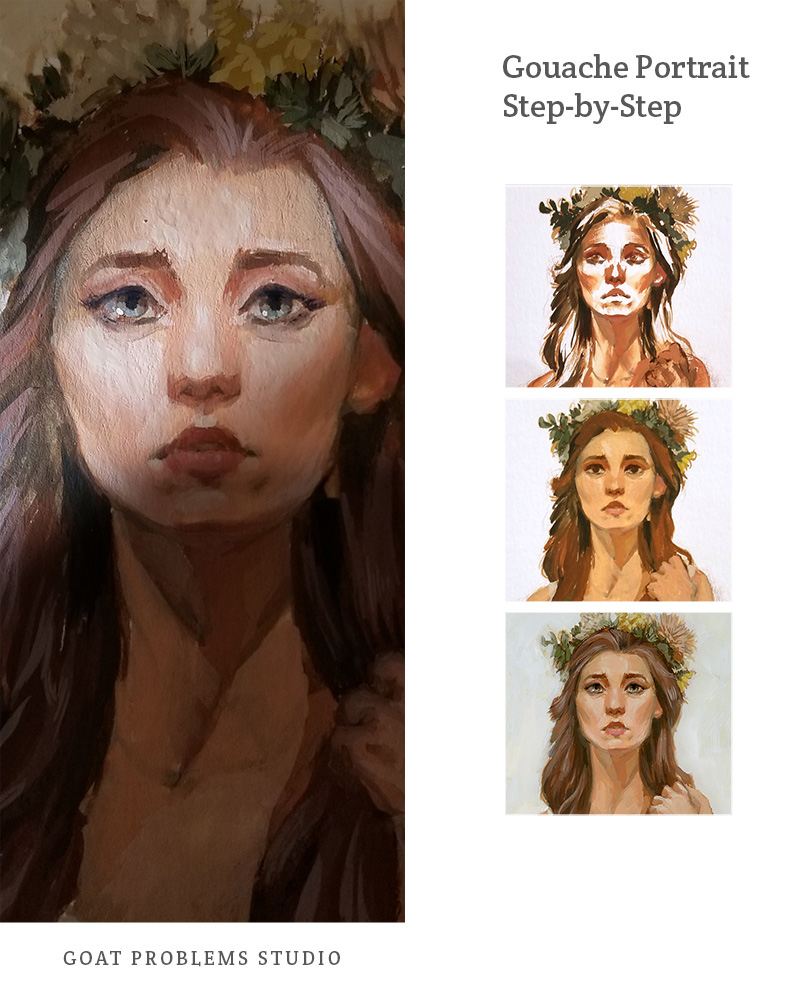
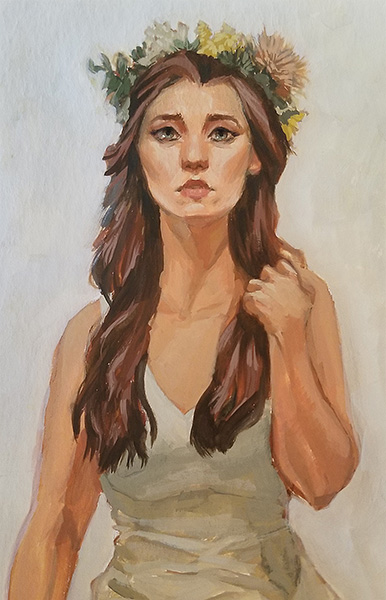
I could continue to paint, but part of the decision making process is knowing where to stop. Sometimes I’ll add a few touches if I couldn’t completely finish the painting at a live model session. This is usually the background, since I want to work on painting the model while they’re there in person. But I always scan my paintings once I’ve decided they’re finished since that gives a nice finality to it. Here’s the scanned and finished piece:
Read More
if you’re interest in gouache painting, I talk a little about my travel kit in Need-to-Know Tips for Sketching Outside and how to dispose of paint safely in my post on Paint Toxicity.
Want to read more like this? Sign up for my newsletter for a monthly reminder of blog posts and other things happening at the studio!
Recent Comments